Step by step guide creating task workflows
STEP 1: TASK LABELS
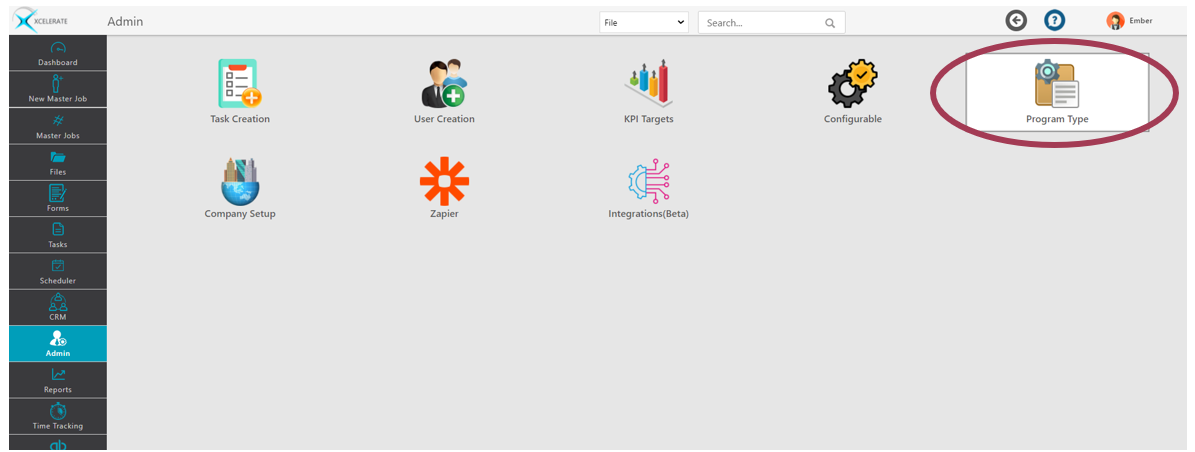
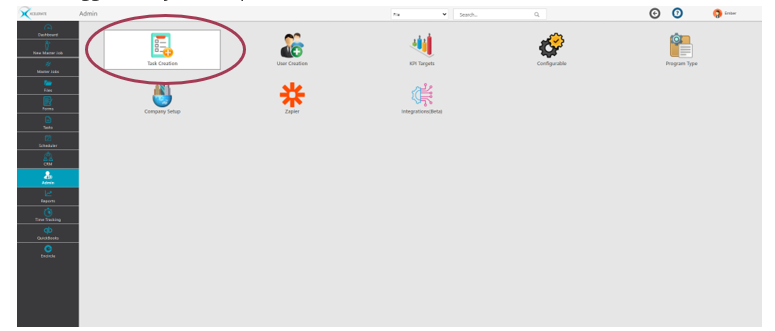
Once logged into your unique Xcelerate environment click on Admin*>Task Creation:
*Reach out to support@xlrestorationsoftware.com if you do not have an Admin Tab
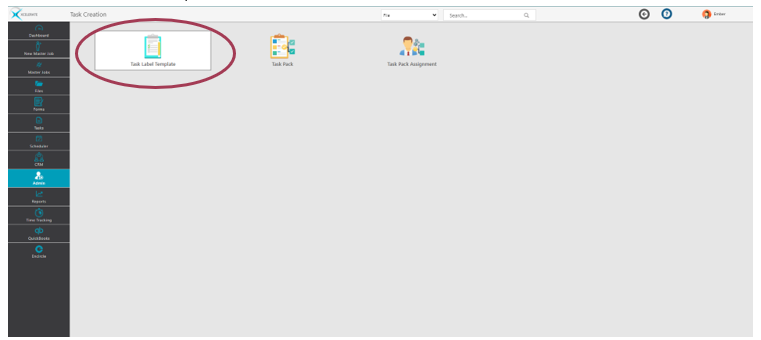
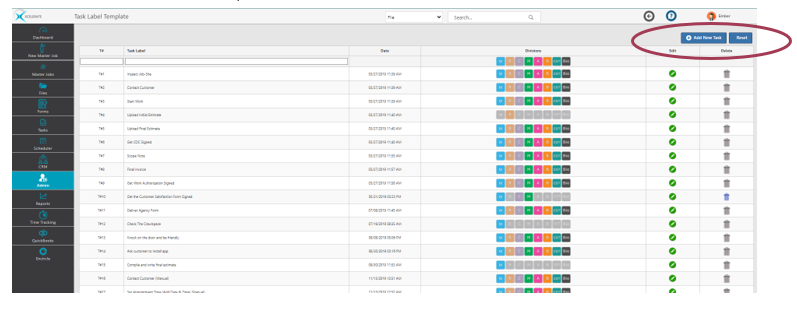
Then Task Label Template:
To create a new Task Label, click Add New Task Pack
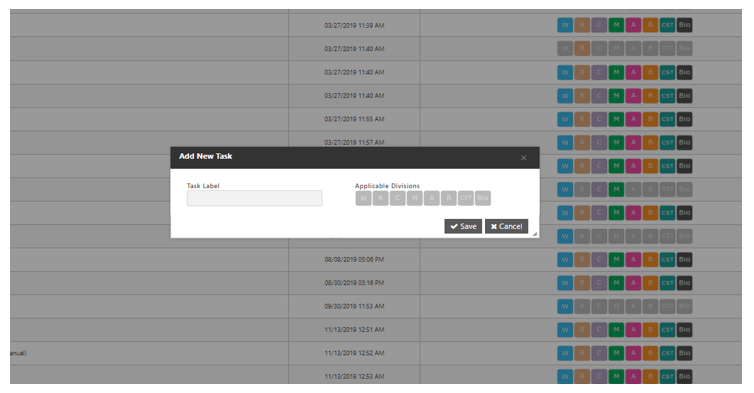
Enter Task Label, select applicable divisions & click Save
Task label is the direction to your staff that will walk them through the scope of every job. (i.e. “Contact Customer”) These can be created for each of your divisions as needed. For a full list of basic recommendations please refer to Xcelerate Task flow – Best Practices.
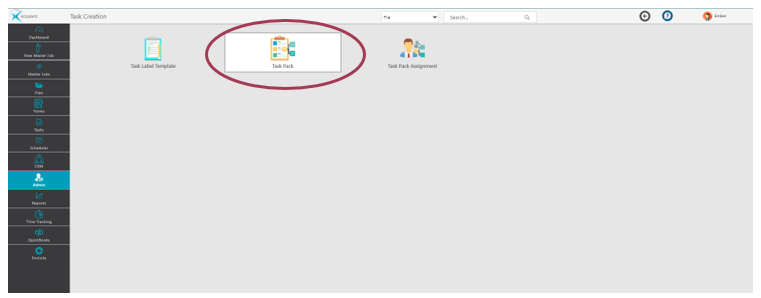
STEP 2: TASK PACK
Once all of your task labels have been entered head back through the admin section and select Task Pack:
Click Add New Task Pack
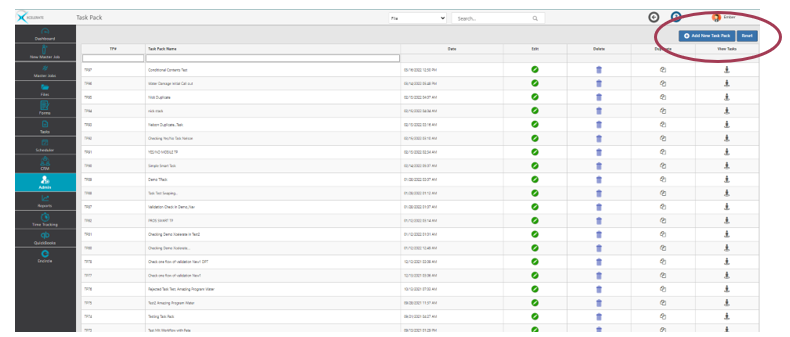
All the task labels previously created will be in the top section of the page. Begin to drag and drop them into the area below. Arrange in the order you would like them to appear per your preferred scope of work.
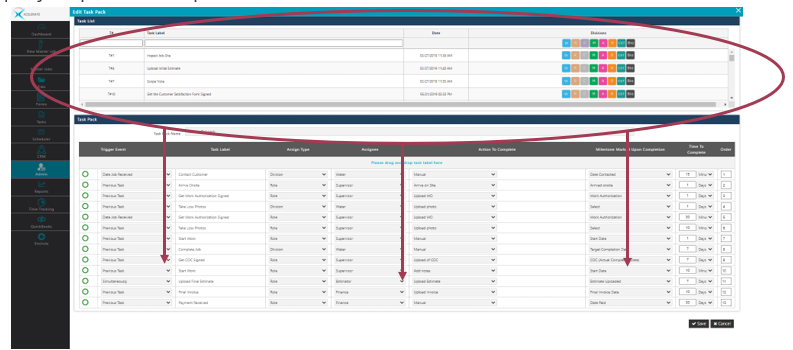
Name your Task Pack. As a best practice include the name of division, program or TPA this task will be assigned to in Step 3. (Example: Standard Water)
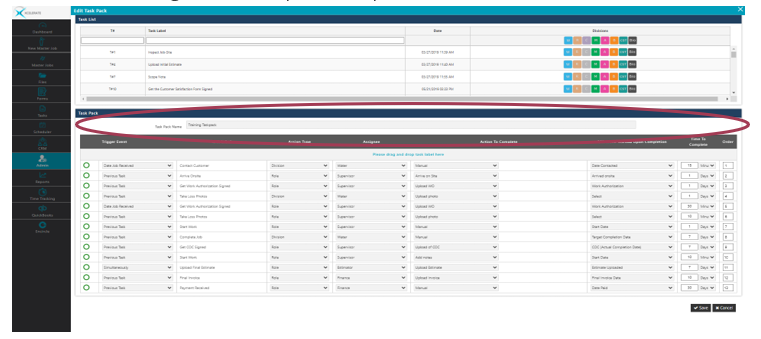
Begin to customize each column by according to your preferences:
Trigger Event: The selection in this column will trigger the task to fire for your team. You can schedule this to initiate as a milestone is completed or simply as the previous task is completed. The simultaneously option will allow for two tasks to fire at the same time. The first task in the list should always be set to Date Job Received.
Assign Type:
Division: Will assign the task to the entire department.
Role: Assigns the task to a particular person as assigned on the file.
Assignee: Depending on the selection of Assign Type, Assignee will change. If Division was selected as Assign Type, then select the division. If Role was selected as Assign Type, choose the individual the task will be assigned to. PLEASE NOTE: Actual assignment occurs when the file is created.
Action to Complete: This will create automation for your tasks depending on your selection.
Manual: Requires your staff to manually enter a note and complete this task. This is a great opportunity to capture documentation on the job.
Automatic: Selections such as Arrive Onsite, Upload WO, Photo, COC, Invoice, etc. will be completed automatically as they are uploaded to the system.
Add Form/Document: This option will instruct your team to complete a form or upload a document of your choosing.
Conditional tasks: Will ask a yes or no question and based on your team’s answer they will be presented with the appropriate next task. Tasks that appear in the yes or no dropdown menu will be tasks lower in the list.
Milestone Marked Upon Completion: Select the milestone you would like to have marked as complete when selected. The date the task is completed will be the milestone date.
Time to Complete: the allotted time before the task appears overdue
Order: Optional method for arranging the order of tasks. Drag and drop is another alternative.
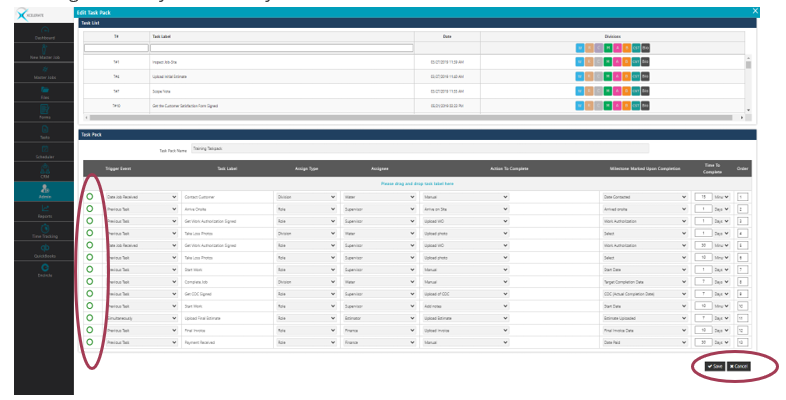
Once all columns have been completed the icon on the far left of the line will turn from red to green and you are ready to save.
STEP 3: TASK PACK ASSIGNMENT
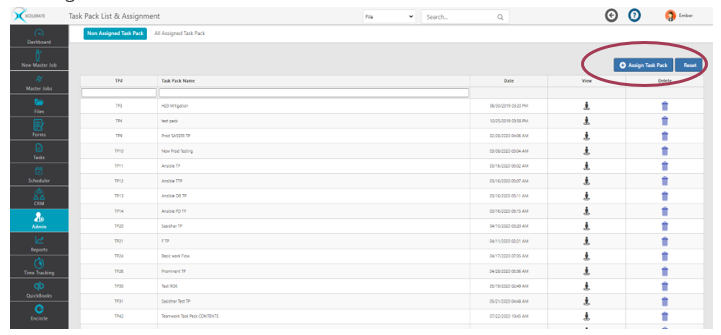
Once your task pack has been saved click Admin>Task Creation>Task Pack Assignment:
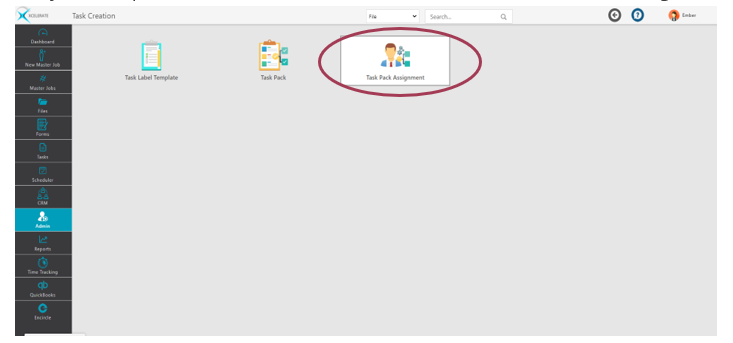
Click Assign Task Pack
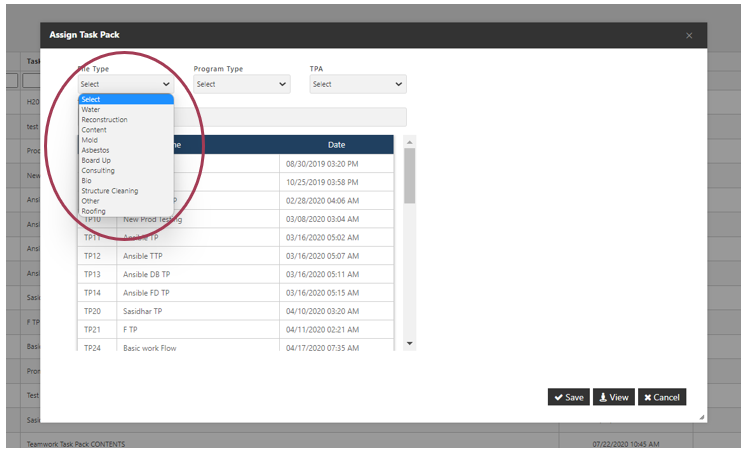
Select the file type & division you would like to assign the task pack to
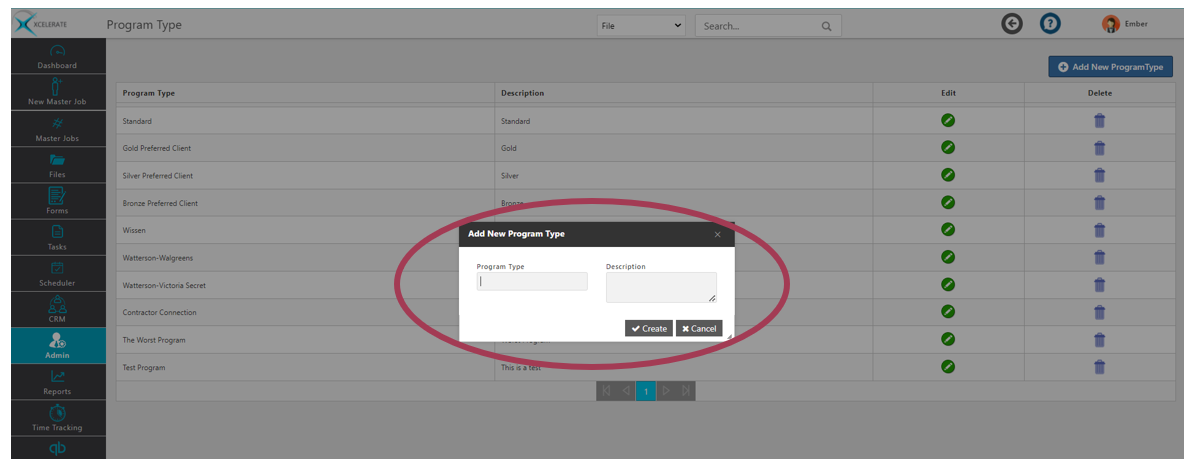
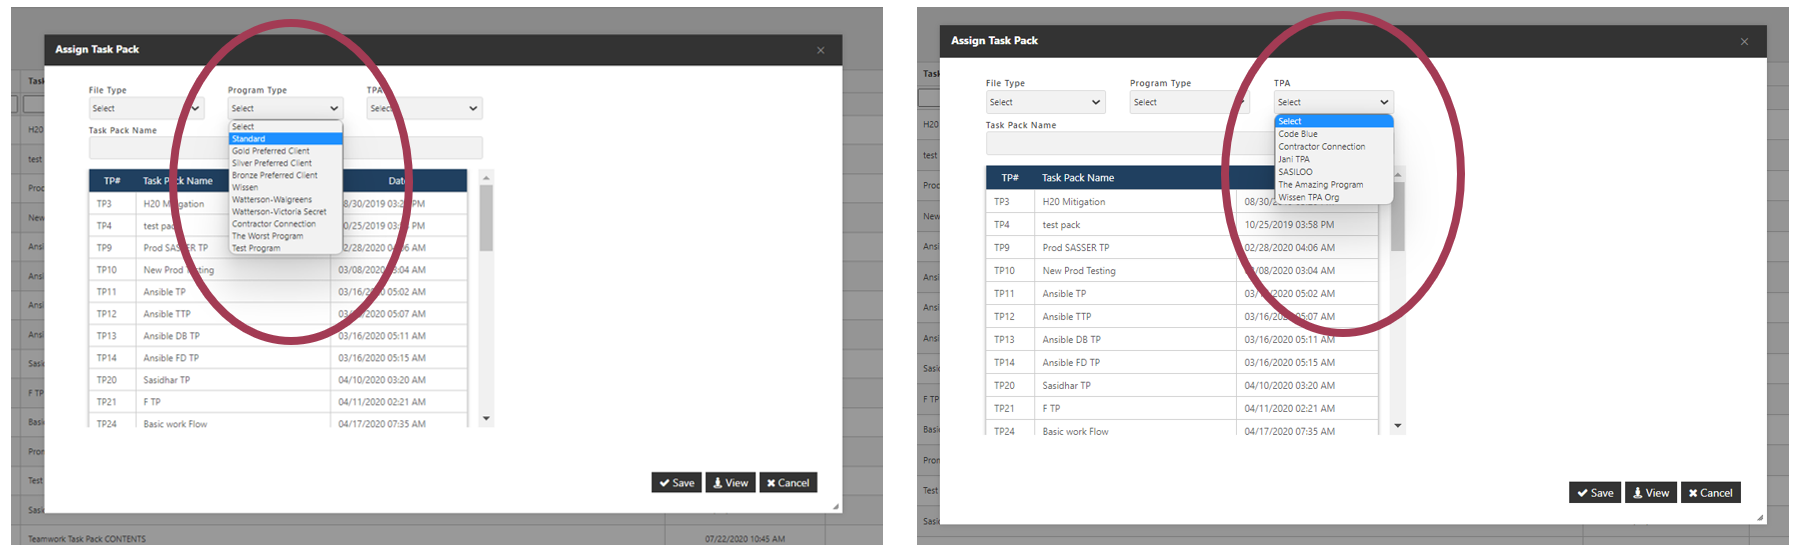
Select the Program Type* & TPA (optional):
Select the task pack from the list that you created in step 2 & click save
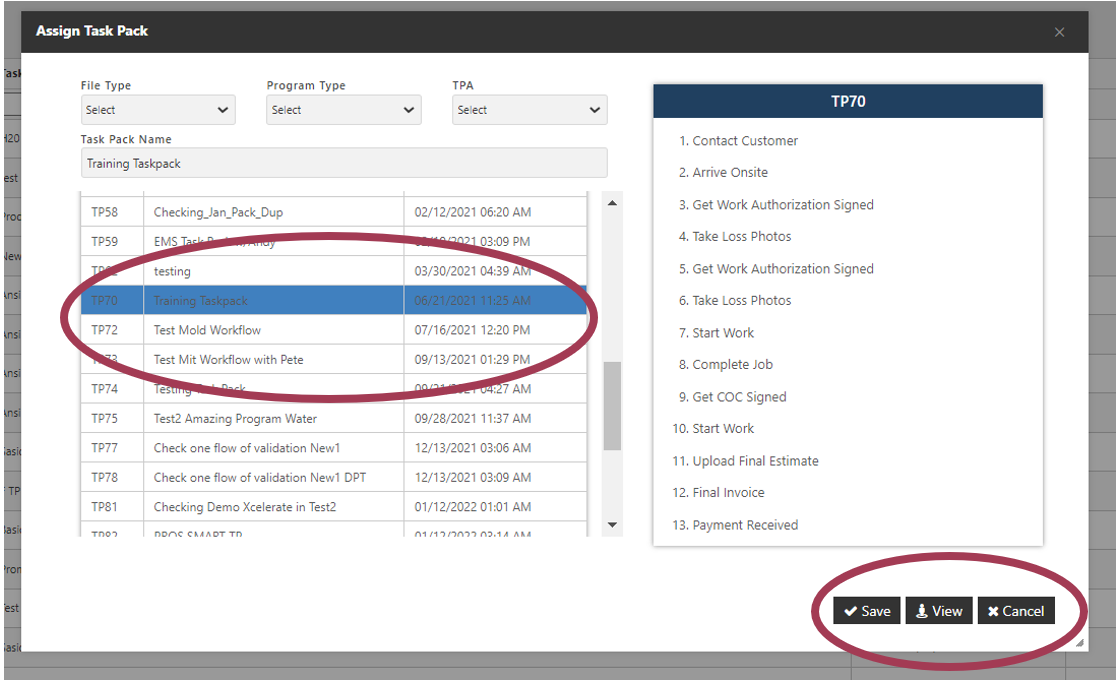
Your tasks will now be assigned for the division, program & TPA you have selected.
*Please Note: Additional Program Types can be added within your Admin section (Admin>Program Type)